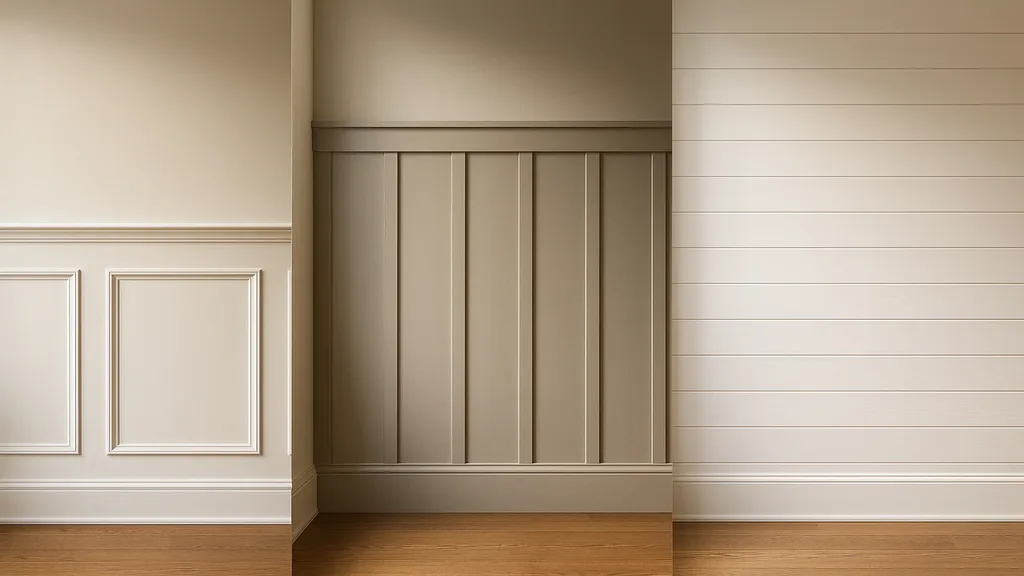
One of the simplest ways to transform a room from builder-basic to architecturally interesting is to add a wall treatment. Wainscoting, board-and-batten, shiplap, and picture-frame moulding each create depth, shadow, and character on otherwise flat walls.
But each serves a different aesthetic, and the execution details matter enormously. Here is my guide to choosing and installing wall treatments correctly.
Wainscoting
What it is: A traditional wall treatment covering the lower third of a wall, typically combining a baseboard, vertical stiles, horizontal rails, and raised or recessed panels. Topped by a chair rail moulding.
Appropriate style: Traditional, colonial, transitional, heritage homes
The proportions that matter: Classic wainscoting height is 32-36 inches — roughly one-third of a standard 8-foot wall. Going higher (48 inches or more) creates a more dramatic, formal effect suitable for dining rooms, hallways, and stairwells. Going lower than 30 inches looks undersized and awkward.
Common mistakes I see:
- Chair rail installed at random heights with no relationship to the wall proportions or window sills
- Panel sizes that are not evenly distributed across the wall, leaving narrow slivers at corners
- Baseboard and chair rail profiles that do not complement each other stylistically
- Insufficient paint coverage in panel recesses, leaving visible primer or bare MDF
My approach: I lay out the panels mathematically so they are equally sized across each wall. Every panel is the same width, with adjustments handled symmetrically at corners. The chair rail aligns with the bottom of window sills wherever possible, creating a continuous horizontal line that unifies the room.
Board-and-Batten
What it is: Vertical boards applied to the wall surface, with narrow strips (battens) covering the seams between boards. In modern interior applications, the effect is typically created with flat boards or MDF strips applied directly to drywall.
Appropriate style: Farmhouse, modern farmhouse, cottage, coastal, transitional
The proportions that matter: Batten spacing of 12-16 inches creates a balanced, intentional look. Spacing battens too closely (under 10 inches) creates a busy, claustrophobic effect. Spacing them too widely (over 20 inches) loses the pattern entirely.
Board-and-batten can go full height (floor to ceiling) for maximum impact, or half height with a flat cap rail for a more restrained application.
Common mistakes I see:
- Battens that do not extend fully to the floor, leaving a gap above the baseboard
- Uneven spacing that is clearly eyeballed rather than measured
- Battens installed over textured walls without proper flattening, creating visible gaps
- Wrong proportions — battens that are too thin (under 1.5 inches) or too thick (over 3 inches) for the wall
Shiplap
What it is: Horizontal boards with a rabbet (notch) cut on the top and bottom edges, allowing them to overlap and create a tight, weather-resistant joint. Originally used as exterior cladding, shiplap became an interior design trend driven by its clean, casual, horizontal lines.
Appropriate style: Farmhouse, coastal, casual, cottage, Scandinavian-inspired
Where it works best: Accent walls, bedrooms, bathrooms, mudrooms, laundry rooms. Shiplap adds warmth and texture without formality.
Where it does not work: Shiplap in every room of a house creates monotony. It works best as a feature in one or two spaces, not a whole-home treatment.
Common mistakes I see:
- Using thin, warped boards that create uneven lines and gaps between courses
- Failing to account for wall irregularities — shimming is essential for straight lines
- Painting shiplap before installation, then having to touch up every nail hole, cut, and edge
- Installing shiplap in moisture-prone areas without proper material selection (solid wood shiplap in a shower surround will warp; use PVC or sealed MDF instead)
Picture-Frame Moulding
What it is: Rectangular frames created from moulding applied directly to flat walls, creating a raised-panel effect without removing or replacing the existing wall surface.
Appropriate style: Traditional, transitional, European, Parisian-inspired, formal
Why I love it: Picture-frame moulding is one of the most cost-effective ways to add architectural character. The material cost is minimal (the moulding itself), and the visual impact is significant — especially when painted the same colour as the wall, creating subtle shadow-play.
The proportions that matter: Frame sizes should relate to the wall dimensions. On a standard 8-foot wall, frames of 18-24 inches wide and 24-36 inches tall create a classic proportion. Spacing between frames should be consistent (3-4 inches).
Common mistakes I see:
- Frames placed randomly without alignment to each other or to room features
- Using overly ornate moulding profiles that compete with other trim in the room
- Inconsistent spacing between frames and between frames and adjacent walls
- Visible caulk gaps at mitre joints (a sign of rushed installation)
Installation Quality Indicators
Regardless of which wall treatment you choose, here are the quality markers that separate professional installation from amateur work:
- Tight mitre joints: Every corner joint should be seamless, with no visible gaps
- Level lines: Chair rails, cap rails, and horizontal elements should be laser-level straight
- Consistent spacing: All repeating elements should be measured, not estimated
- Proper caulking and filling: Nail holes are filled, sanded, and invisible. Caulk lines are clean and consistent.
- Paint quality: Smooth, even coverage with no brush marks, drips, or missed spots in recesses
At JVR Complete, custom woodworking and millwork is one of our core specialties. If you are considering a wall treatment for your Niagara home, contact us for a design consultation. We will help you choose the right treatment for your style and ensure it is installed to a standard that adds genuine value to your home.